Monday, January 27, 2014

Italian Stuffed Turkey Burgers

All I have to say is, when will this winter be over???  As much as I love getting the 5 AM snow day phone calls, I will hate having to work extra days into summer.  I know, I know, "welcome to the real world" "everyone else has to work all summer" "at least you get a day off."  Maybe you're just angry because you didn't choose to work in the schools.  And if you do work in the schools you'll understand that you work hard enough during the year to earn all of those days off!  I digress.

In the midst of another Ohio freeze, I felt we needed something summer-y for dinner.  Like a burger.  A turkey burger.  Enter: the Italian stuffed turkey burger.  Because it's healthier, turkey can be somewhat dry compared to ground beef (especially in burger form).  So I decided to stuff them in order to add some gooey cheesy goodness. 

Ingredients:
1 lb lean ground turkey meat
Italian seasoning
Oregano
Basil
Onion powder
Garlic powder
Salt and pepper
Mozzarella cheese
Whole grain hamburger buns
Pizza sauce

I started by seasoning the meat to my liking.  I added similar amount of each seasoning.  Which is a lot.

Then you have to remove all jewelry and get your hands dirty.  Mix the seasoning and meat until combined throughout.  Next I used our awesome stuffed burger maker to form the patties.
It not only form the patties perfectly, but has a piece on top that will push down the center of the meat.  Then stuff away.
Per Weight Watchers, 2 tablespoons of their Italian blend shredded cheese is perfect.  You could also use regular mozzarella. Last, put the lid on.
We got a little crazy with the cheese on a couple of these so the tops didn't fit that great.  Since it's disgustingly cold outside, we obviously did not grill these.  However, I would highly recommend that option.  I used oil and a frying pan on the stove.


Once cooked through, add some pizza sauce and eat on a whole wheat hamburger bun.

I'll admit, these don't look that appetizing.  But they were really good.  It was like eating pizza in a burger.  I asked Bob if these would be an "eat it again" option and he said yes.  So they passed the test. 

Friday, January 17, 2014

BBQ Chicken Pizzas

As I start writing this post, I realize that it seems like we eat a lot of chicken.  Actually, it doesn't just seem like it.  We do eat a lot of chicken.  I'm ok with it though because it's healthy and easy to dress it up.  This is one of my favorite meals.  It uses leftovers, is so easy to make, very few Weight Watchers points, and is delicious!

I found this original recipe on the Weight Watchers website.  However, it included many things that my husband would absolutely not eat.  So, of course, I had to revamp it.

Ingredients
1 cup shredded chicken
1/2 cup BBQ sauce (I use Baby Ray's)
Onion powder
Pepper
3 whole wheat tortillas
Chives
1/3 cup shredded cheddar cheese

You can start by using leftover chicken, such as rotisserie, or boil and shred chicken breasts.  As you know, I like to shred a bunch of chicken and freeze it sometimes.  That way, when I get home late and don't feel like cooking, it provides a quick and easy meal.

 
After that, combine the chicken, BBQ sauce, onion powder, and pepper in a bowl.  Adding some chopped onions would be delicious.  I would do that if I was you.
 
 
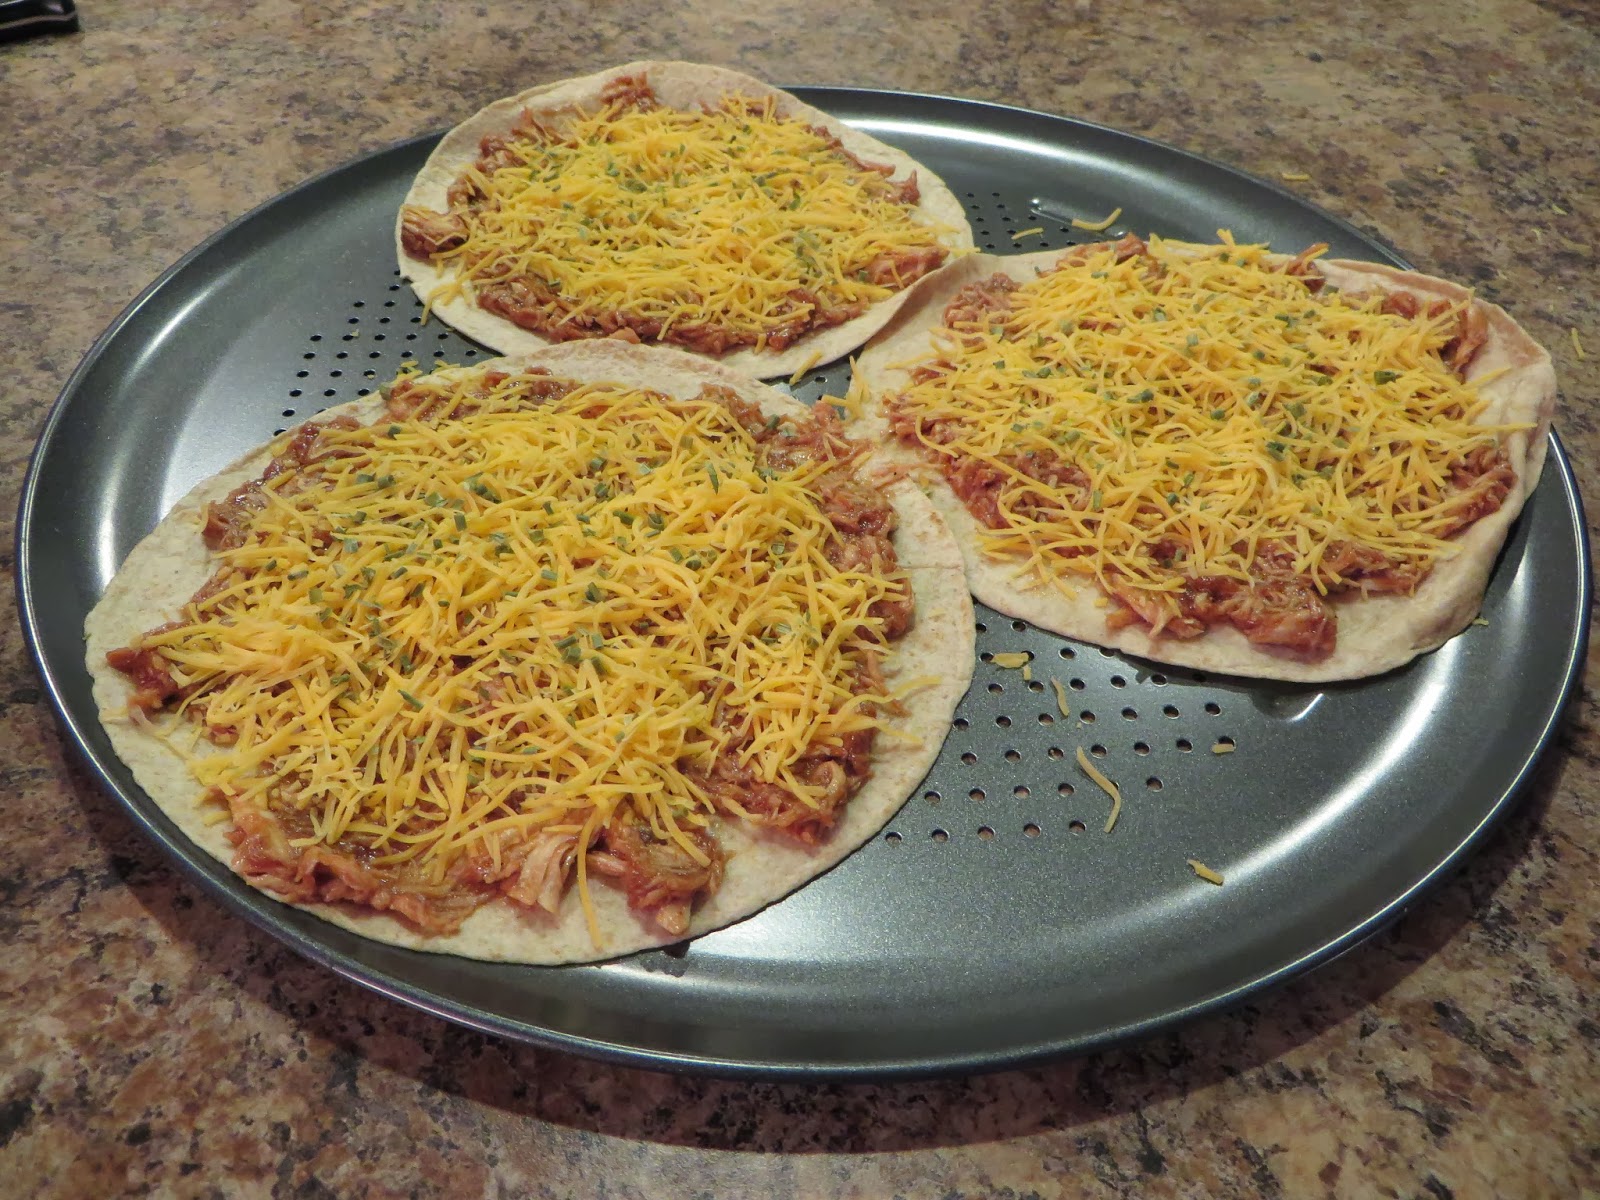
Then get your tortillas and put them in a baking sheet or pizza pan.  We love these low carb fajita wraps.
 

Spread the chicken mixture evenly on the tortillas.  Since I measure out WW points for hubby, the measurements are very specific.  For mine I pile as much on as possible :)

Then sprinkle the cheese on top.  We found a Weight Watchers Mexican blend shredded cheese that works really well.  I also use plain cheddar sometimes.  In the summer, I like to put fresh home-grown chives on top.  In the winter, I'm stuck with dried chives.


Bake at 400 degrees for about 8 minutes, depending on how crispy you want the crust.  Ours got a little over done this time around...
 

I think these would be fabulous with some veggies on top.  Sometimes we make tortilla pizzas with spinach. That's one of the few veggies I can get HIM to eat! 

Tuesday, January 7, 2014

Breaded Honey Mustard Chicken

It has been a crazy busy month!  We hosted Christmas Day at our house so the week prior to that was spent writing 3 million reports for work, and prepping for the holiday.  We had a wonderful Christmas with our families and lots of good food!  After that, we went out to eat A LOT.  But now that January is here (ugh), life is starting to get back to the same old routine.  I worked one day last week (I know, we went back way too early) and am now on my THIRD snow day (or 'cold' day technically).  Tomorrow it's back to the grind after a very relaxing few days.

I wanted to share a meal I started making since my hubby has been doing Weight Watchers.  It's breaded chicken that you could serve alone, as chicken parm, chicken marsala, etc, but a little healthier.  I once saw a Weight Watchers recipe that substituted corn flakes for breadcrumbs.  I took that knowledge and applied to a ton of different meals.   This recipe includes a honey mustard sauce.

Ingredients:
1 lb boneless skinless chicken breasts
1/2 panko
1/2 corn flakes
salt and pepper
2 tbsp dijon mustard
1 tsp lemon juice
1 tbsp honey

First, combine the corn flakes and panko in a plastic bag and nonchalantly crush them.  I wanted it to be a little crunchy but not with huge pieces of corn flakes.  Then pour it on a shallow dish (aka paper plate for less dishes). 


Then combine the dijon mustard, lemon juice, and honey in a shallow bowl.  Sprinkles salt and pepper in the mixture to taste.
 After that, it's time to flatten your chicken breasts.  This is really great stress relief, if you need it.  Put each piece of chicken in a plastic bag one at a time and pound it until they're about 1 inch thick.  I hate waiting for chicken breasts to cook so this speeds up the process a lot.

Next, dip the chicken in the mustard mix and then the panko/corn flakes until they are evenly coated.  Then place them on a baking sheet.

 I baked them at 375 for about half an hour or so.  I served them with our favorite oven fries :)


You could also make extra honey mustard sauce and dip the chicken into it.  So yummy.

Monday, December 9, 2013

The Most Wonderful Time of the Year


I am most definitely counting down the days until Christmas.  And mostly because it means 8 days off work.  On my most frustrating days at school, I remind myself that I do this so I can have those days off.  And also so I can make a difference in the lives of these little people in hopes that they can become functioning memebers of society... right?...

We I started decorating for Christmas last week.  Outside, I made Bob put up some lights, and he was none too pleased.  Then I was in charge of the inside decor. 

Adding this table behind the couch was one of the best things we ever did.  Our house isn't very original so we don't have many nooks and crannies to decorate.  So this has become my seasonal table, as you've seen in previous posts. 


My grandpa made those wooden reindeer and they make their appearance every Christmas :) 


 I got my inspiration for this on Pinterest.  They showed giant glass containers filled with a bunch of different shapes/sizes of ornaments, etc.  However, I couldn't find any big containers for under $20.  No thanks.  So I settled for these.  And I'm able to rotate and reuse them for different seasons.  I filled the biggest one with some sparkly red and gold ornaments I found at Pat Catan's on sale.  The rectangle one has vase filler cubes, also from Pat's on the bottom and small wreath ornaments on top.  My favorite is the one with candy canes.  Who doesn't love to use food as decoration??


Finally, I put some greenery I cut off from my big strand underneath and put it in the smallest container.  I added some pinecones I found in my Christmas stuff and some cinnamon sticks.  They make the house smell amazing (until they wear off).  I love that smell though so I may keep rotating with fresh cinnamon.


And here is the wreath I made last Christmas.
Everything was purchased from the wreath making section at...you guessed it...Pat Catan's!As you know, I love making my own wreaths.  It's not that it's necessarily cheaper, just more fun :)

Tuesday, December 3, 2013

A Happy Thanksgiving

It makes me sad that Thanksgiving is often overlooked by the general public.  The pilgrims put a lot of work into this holiday and I think that it deserves more credit.  I love Thanksgiving food.  I love the parade.  I love having 3 days off of school.  I love spending time with my family.  And I love Black Friday.  To a point.  I'm good for a few hours of shopping and then I wanna curl up under a blanket with a book. 

This Thanksgiving I tried out a brussel sprout recipe I found on Eating Well.  I slightly, barely adapted it to fit my circumstances. 

Ingredients:
1/4 onion, chopped
1 lb brussel sprouts
5 slices pancetta
1 tsp ground sage
1 tbsp olive oil
Salt and pepper, to taste

Start by cutting the brussel sprouts in half and slicing the pancetta.  Combine them in an 8X10 baking pan. 


Mix in the chopped onion, sage, salt, pepper, and olive oil. 

I baked them at 350 until they were tender.  I have no idea how long because there was a lot of multi-tasking and over-stimulation going on at my mom's.  The original recipe says 450 degrees for 15 minutes. 

This was the only picture we were able to capture of the final product because everyone ate them.  They were SO good.  I would definitely use this recipe again.  My apologies if you don't like brussel sprouts--something is wrong with you.  Something about the pancetta mixed in there makes them that much better.


Even the dogs thoroughly enjoyed the holiday.


And now we've moved on to Christmas shopping, gift wrapping, and decorating.  Can't complain about that :)

Sunday, November 24, 2013

Rice Noodle Stir Fry

Happy almost Thanksgiving!  We already had one feast with Bob's side of the family this weekend.  It was just a warm up for the big day.  Speaking of warm up, it's been a whopping 24 degrees all day.  The dreaded season of winter is upon us.  I am the biggest baby when it comes to snow and freezing temps.  Bob isn't a fan either.  So this year we decided that instead of hibernating and going to bed at 6:00, we're going to try to enjoy winter.  We're hoping that skiing, tubing, etc. will make it go by much faster....(crossing my fingers).

In the meantime, I have another quick, easy, and healthy meal.  Involving these bad boys.
They're a lot lighter than regular noodles and have a much more intriguing consistency.  I use them in place of rice to go with a stir fry.   Also, they only take roughly 2 minutes to boil.

Rice Noodle Stir Fry
1 lb. chicken tenders
Chopped onion
1 clove garlic, minced
1/2 tsp grated ginger
1 package rice noodles
Baby bok choy

For sauce:
2 tbsp low sodium soy sauce
1 tbsp lemon juice
2 tsp white vinegar
1 tbsp Sriracha hot sauce
2 tsp honey
1/2 cup chicken broth
1 tbsp corn starch

Start by cutting the chicken into bite size pieces.  Saute with a little oil, onion, garlic, and ginger until cooked.  Meanwhile, start boiling a pot of water for the noodles.


In a mixing bowl, combine ingredients for the sauce.  I added a whole tbsp of Sriracha to give it an  extra kick.  By the way, I swear that stuff is getting hotter with age.  Dump the sauce in with the chicken.

 Cook on medium heat until sauce thickens.  And don't forget to boil your noodles.  I always forget, so good thing these only take 2 minutes. 
Sidebar: Someone was patiently waiting for his own dinner...

 I also made some baby bok choy to go on top with the stir fry.  Bok choy is a Chinese cabbage that goes great with basically anything.
Chop it up and saute it with a little soy sauce and vinegar.
Serve the chicken and sauce over the noodles, with the bok choy on top.
It probably took longer to take the pictures than to actually make this meal.  Let me know how you like it :)


Thursday, November 21, 2013

Simply Chicken Fajitas

The main thing my hubby and I have been working on with his diet is finding meals that are healthy, delicious, AND filling.  Kind of hard to do.  He told me the other day that these fajitas hit all of those points! The best part is that they are so quick and easy to make (definitely a plus for me).

I found these amazing low carb whole wheat burrito wraps at the grocery store one day.  I've learned that anything "low carb" is perfect for Weight Watchers, so I decided to try them.  They're so yummy!  We hate wraps that are too thick and inhibit the other ingredients from being noticed.  And Bob loves that he can eat 2 of them.  I love anything that has a few ingredients and is still flavorful!

Chicken Fajitas

1 lb chicken tenders
1/4 chopped onion
1 clove garlic
1 tsp cumin
1/4 tsp red pepper flakes
1 tsp oregano
1/2 tsp chili powder
1/2 tsp pepper
2 tsp lime juice
Whole wheat wraps
Lettuce
Shredded cheese

Heat up some oil in a skillet, then fry up the onion and garlic.  Cut up the chicken into bite sized pieces.  Add the chicken to the skillet and saute for a few minutes.  Then add the seasonings and lime juice.   Continue to saute until cooked through.


Pile a few ounces of chicken onto a heated wrap and add your preferred seasonings!  We only add lettuce, cheese, and some taco sauce.  If I had the time, desire, and a less picky husband, I would add sauteed red/green bell peppers.

Bob cuts up some string cheese and puts it on his to further decrease the amount of points.  
I, on the other hand, load on the shredded cheddar like nobody's business :)

In other news, we invested in a new camera!  It was time that we took the plunge.  We're adults now, right?  So hopefully I can take improved pictures of my food.  Hopefully.  Photography isn't one of my strong suites.